Tuesday, November 29, 2011

Stir Fry Recipe from Food Network Magazine

I try to keep a nice variety of vegetables on hand so I can make a great vegetable dish every night for dinner. Tonight, I did the prep for both tonight's meal and for tomorrow night. Once you get washing and cutting vegetables for one meal, you might as well get some ready for the next one. It saves time.  So, here is a picture of all of the vegetables I pulled out of the refrigerator.  Believe it or not, that wasn't all of the vegetables I had, but is was most of them!

I had celery, green onions, baby broccoli, carrots, baby bok choy, kale, cilantro and half of a red pepper.

Tonight's dinner was stir fry, so to serve 3-4 people, I usually cut up about 8 cups of vegetables.  I have a great recipe from Food Network magazine that I use, and that everyone at our house loves. The recipe came out of the March 2010 issue.

Tomorrow night, I plan on making a sauteed vegetable dish based on a recipe from Daniel's Challenge Garlic Tomato Kale.  I'll post my variation on that recipe tomorrow night.

Anyway, you can see from the picture below the final results of the chopping!
  1. The Ziploc bag on the left contains the vegetables for tomorrow night (3 baby bok choy, 1 1/2 c. chopped Kale, 3 stems chopped celery and one chopped green onion).
  2. Top center is about 7 -8 cups of chopped kale, 1 baby bok choy, 3 chopped green onions, 1/2 cup chopped cilantro, 1/2 large carrot, chopped, 1/2 red pepper, and a small bunch of baby broccoli. 
  3. Bottom center are all of the scraps for my composter.
  4. The plate on the right is the remaining green onion and 1/2 carrot. The carrot will be juiced along with a few other carrots tomorrow night for that vegetable dish.

I cooked my fish, Ono, by baking it in the oven. You can stir fry it if you want. Ono dries out pretty easy, so I like to control the cooking of it. I added it to the stir fry at the end.

Here is a picture of the vegetables in the frying pan before they got cooked.


And after cooking, before adding the sauce...


And here is what it looks like on the plate with some rice...


Delicious! Here is the original recipe (11,375 Stir-Fries from March 2010 Food Network Magazine):

You can choose to marinate the protein the way the recipe calls for, or not. If I have pre cooked protein, I will skip that step and just heat it up and add it to the stir-fry. It works very well either way.

Step 1: Pick a protein  (3/4 lb. beef, pork, shrimp, chicken or tofu...all boneless/skinless)

Step 2: Marinate. Whisk 1 egg white, 1 TB rice wine or dry sherry and 1 TB cornstarch. Toss with your protein; cover and refrigerate 1 hour.

Step 3: Prep 3 cups vegetables in any combinations and sliced ( carrots, celery, bell peppers, scallions or green onions, mushrooms, bok choy or cabbage, leeks, snow peas (whole), asparagus, baby spinach, broccoli or cauliflower (blanched), thawed frozen peas or edamame.

Step 4: Sauce. There are 5 different recipes for sauces, but I use the Clear Sauce 9 out of 10 times.

Clear Sauce:  Mix 3/4 c. chicken broth, 1 TB cornstarch, 2 TB Chinese rice wine or dry sherry, 1/2 tsp sesame oil, 1 tsp salt (I only use 1/2 tsp and it is perfect), and 1/2 tsp sugar. Wisk together.

Step 5: Stir-Fry
  •  Drain the excess marinade from the protein. Place your sauce, vegetables and protein near the stove.
  • Heat 1/4 inch peanut or vegetable oil in a wok or skillet over medium heat. Add the protein; slowly stir until almost opaque, 30 seconds to 1 minute (for tofu, brown on both sides-do not stir) Transfer to a plate; discard the oil and wipe out the pan.
  • Heat the pan over high heat, 1 to 2 minutes. Add 2 TB oil, then 2 cloves minced garlic, 1-2 TB minced ginger, 2 minced scallions and a pinch each of salt and sugar; stir-fry about 30 seconds. Add the vegetables, starting with the ones that take the longest to cook; stir-fry until crisp-tender.
  • Add the protein and sauce and stir until the sauce is thick and the vegetables and protein are cooked through, about 3 minutes. Thin with chicken broth, if needed. Garnish with sliced scallions, peanuts, sesame seeds, slice jalapenos and or cilantro.


Friday, November 18, 2011

72 Hour Kit Food Planning

Having a 72 hour kit for each family member in case of an emergency where you are required to evacuate your home is a smart idea.  Our family has actually been evacuated from our home twice due to fast moving fire on the nearby hillsides. This happened once when we lived in Southern California, and once when we lived in Utah County, Utah. We have been on alert for a possible evacuation due to fire 2 other times, and possible evacuation due to earthquake damage when we lived in Southern California. We were very fortunate to not have to evacuate our home after the Sierra Madre earthquake, when many houses on the street 2 houses over were condemned. Needless to say, our family wouldn't be without our 72 hour kits!

I've been switching out the food in our 72 hour kits. I usually do this to coincide with LDS general conference (April and October), so I'm about a month behind. For this post, I'm sharing how I planned for the food component of our 72 hour kits. I am not including water in this post, but will in a future post about the entire 72 hour kit.

There are several things to consider when planning what food to put into your kit.
  1. Calorie requirements for each family member
  2. Food allergies/preferences for each family member
  3. Shelf life of food items
  4. Cost of items
  5. Ease of Preparation
Three days worth of meals averaging 1600 calories per day.

Calorie Requirements:  Each family member has different nutritional needs. To determine what your calorie requirements are, go to choosemyplate.gov.  For example, a woman over the age of 50 who is sedentary requires 1600 calories a day.

Food Allergies/Preferences: It goes without saying that if you have an allergy to a certain food, don't include it in your kit. As for preferences, I don't care if I have to eat Vienna sausages for a couple of meals, but a younger child might refuse it. Take all of this into consideration when packing your kits. A variety of items is a good idea.

Shelf Life of Food: When shopping for your food, check the packaging for expiration dates. All of the food that I purchased is good until June of 2012 or later.  I can easily switch out the food next April, and have a couple of months to use it or donate it. This ravioli (below) is good until October 2012.


Cost of Items: I bought most of my items at Wal-Mart and used coupons. A  can of Vienna sausages is only $0.50, so I included them.  I deliberately purchased items that could be eaten without the food being heated. I did not purchase anything that had to be mixed with water.  In an emergency situation where you have to evacuate, you may not have the time, energy or ability to heat up your food. If we had an emergency where we didn't have to evacuate the home, but couldn't use our gas or electricity, we have a propane camping stove with small propane tanks.

Ease of Preparation: As noted above, everything is ready-to-eat. It is definitely not the most nutritious food in the world. It is processed and is higher in sodium, however, for 3 days, it will keep us from being hungry. That is the goal after all! 

Here is a picture of all of the boxed drinks in a gallon Ziploc.  I put all of the crackers, cookies, granola bars, candy and jerky pack into another bag. The applesauce and peanut butter are in a quart size zip lock bag. All of these items will be packed into individual duffel bags/backpacks with each family member's name on the bag. Not pictured is a small Ziploc with plastic spoons and forks.


All of the canned items have a pull top on them. If you get canned items that don't have these, remember to include a can opener! I'm still on the lookout for small (1/2c. size) cans of green beans or corn, which can also be eaten cold from the can.

Menu:

Day One: Breakfast: Cliff Bar, Juice, Applesauce
                  Lunch: Vienna Sausages, Cookies, Juice
                  Dinner: Ravioli, Juice
                  Snack: leftover cookies, hard candy, almonds (not pictured)

Day Two:  Breakfast: Granola Bars, Peanut butter, Juice
                   Lunch:  Tuna Salad/crackers, Juice, Cookies
                   Dinner:  Beef Jerkey/Cheese/Pretzel pack, juice, applesauce, candy
                   Snack: Leftover cookies, hard candy, almonds (not pictured)

Day Three: Breakfast: Chocolate Milk, Poptarts, applesauce
                    Lunch: Peanut butter crackers, canned pineapple chunks, juice
                    Dinner: Vienna Sausages, juice, 2 packages of pretzel sticks
                    Snack: hard candy, leftover pretzel sticks, almonds (not pictured)

As always, you can click on each picture to get a larger view.

I have a large bag of almonds that is not pictured, that will go into my husband's kit.

I hope that this has helped. Feel free to ask any questions! I'll post at a later date about the entire 72 hour kit, which includes water.


Friday, October 28, 2011

Pomegranates and other great produce

I tried posting this a week or so ago, and blogger wasn't allowing me to upload the post. I just found this in my drafts, so here it is. Hopefully, I'll be back to posting atleast weekly again. I've really missed blogging!


It seems like I've taken quite a break from blogging, but I am ready to get back to it!

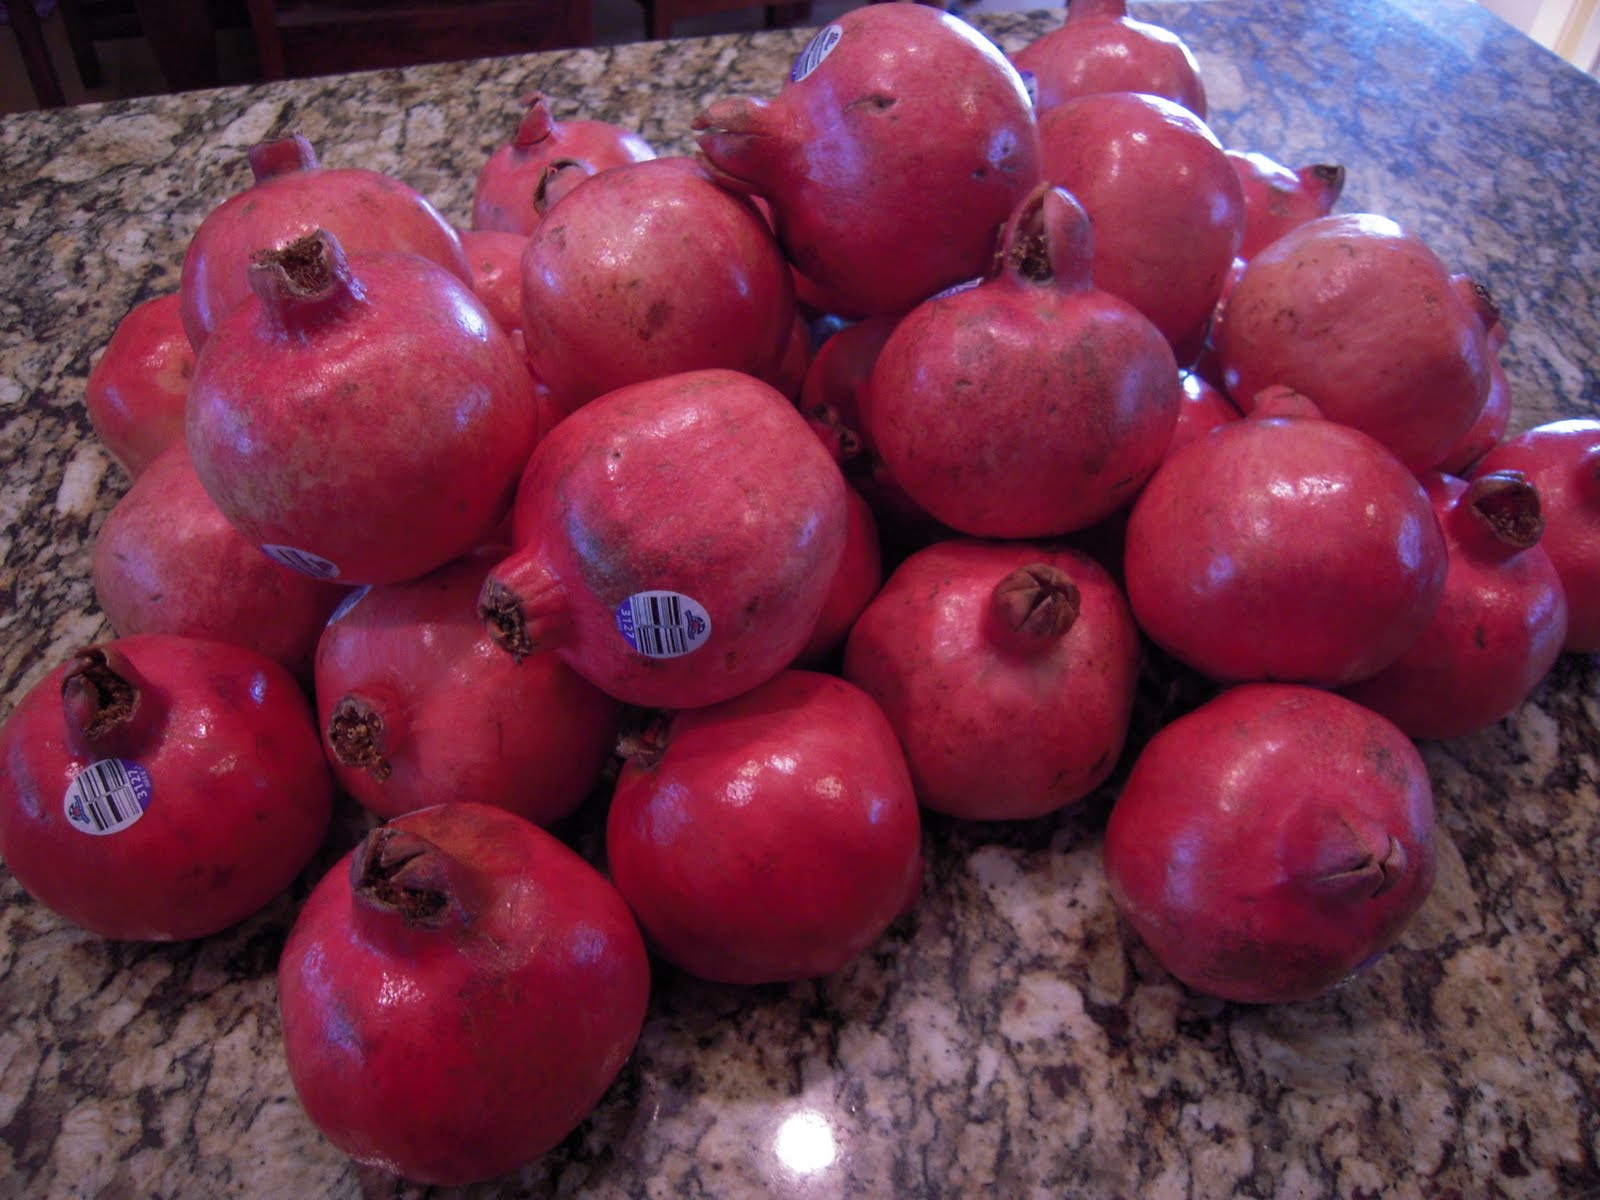
I took these pictures last Saturday after I picked up my Bountiful Baskets co-op offerings. The pomegranates were a great price, $15 for a case of 34. I'm using them as decor this week, but will get ready to process them and get them ready for freezing. Here is a link to see how to open a pomegranate and get the seeds out. It is from POM.
I decided to get the organic basket this week. I had to pitch the 4 large peaches that were included. They looked pretty, but were hard. They were rotten after a couple of days. Weird! Besides the peaches, there were bananas, grapes (they have seeds...bummer), pears, plums and apples. Vegetables included cabbage, fennel (!), kale, sweet potatoes and peppers.

The pears are ripening well and taste amazing. I had a plum this morning and it was delicious. I'm using the fennel tomorrow night in a recipe for dinner. Haven't decided between two recipes, but I'll post when I make one or the other.

Processing Corn on the Cob

When I saw this video on youtube on how to get corn on the cob without all of the silk strings, I thought everyone should see it. Great tip!

http://www.youtube.com/watch?v=YnBF6bv4Oe4

Friday, August 5, 2011

Bizzybee: A Provident Living Retreat

Rachelle, my blogger friend at Pantry Eats, is involved with this sure-to-be-fantastic retreat all about provident living topics. You can check out the website at http://bizzybeeretreat.com/ .
The event is taking place in Enoch, Utah, which is outside of Cedar City.

One of the classes offered is Chickens 101. When we lived in Utah County, Utah, I did raise chickens for their eggs. Loved that experience! I'm not sure what my CC&R's say about having chickens, but I'd sure like to have a few. Nothing like fresh eggs. There are some pretty cool chicken hutches out there in blogland. I'm sure that this would be a fun class.

Home Cheesemaking is the class that I'm most interested in. I have mastered yogurt making, so making cheese seems like the logical next step. This class gives you the experience of making mozzarella from start to finish. Fresh mozzarella cheese is one of my food addictions, really it is! Nothing better than a portabello mushroom burger with fresh mozzarella melted on it. YUM!

Anyway, other classes such as Keeping a Family Cow (something my mother-in-law did for years), Pressure Canning, Soapmaking, Beekeeping, etc. are available.

You can register for the class on their website here.

Monday, April 25, 2011

Black Bean and Corn Salsa

I posted this recipe back in November of 2008, but I make it so often, I thought it was time to revisit it! Besides, I was able to harvest some green onions from my garden to include in the recipe.

After chopping up all of the ingredients, and giving it a good stir, here is a close-up picture.


It is great as a dip or as a side dish. I served it along with my sirloin tip roast and mashed potatoes on Easter Sunday, and it was a hit!

Blueberry Green Smoothie

I thought I'd share my impromptu recipe for a green smoothie this morning that turned out fantastic. I had to go back into the refrigerator and get the same ingredients that I had just used so you could see what went into this before it was blended.


Above, as pictured, I included a handful of spinach, a stalk of celery, a large leaf of napa cabbage, 1/2 cup of blueberries, and last but not least, 1/2 a frozen banana (I slice them up and freeze them so they are ready to blend). With a vitamix, always cover the blade with liquid first to facilitate blending. I used crystal light lemonade! You can use water or juice.


It was delicious. Hope you'll try it and let me know how you liked it!