Showing posts with label sprouts. Show all posts

Saturday, August 11, 2012

Mung Bean Sprouts

Mung Bean Sprouts from Freshlife Automatic Sprouter

This week I've been harvesting zucchini, tomatoes and Swiss Chard from my garden. I also grew some mung bean sprouts in my Freshlife Automatic Sprouter.

I made spring rolls one night, and a stir fry another night. It's always fun to eat them right from the refrigerator as well!

Friday, June 8, 2012

Today's Harvest: Lettuce, Tomatoes and Swiss Chard

I love going out to the garden every morning to see what is ready to harvest. Pictured below is one of the cherry tomato plants that I got this year at Costco. They are about 3 feet tall now, and the tomatoes have slowly been ripening the past 2 weeks.

Cherry Tomato Plant in container
Today I was really pleased to be able to harvest some lettuce (black seeded Simpson lettuce). Those plants just keep on giving! I've been harvesting some every week.

Black Seeded Simpson Lettuce
I washed it all and gave it a spin in my salad spinner. I had enough to fill a gallon ziplock bag.
Isn't it beautiful? It will be perfect for green smoothies (this variety has a sweet taste) and for salads. Next, I took the scissors to a pot of Swiss chard.....

Swiss Chard growing in a pot
After cutting off the stems (I use the stems in smoothies and stirfry), I washed it and spun it dry (lettuce spinner, again!) and had enough to fill a gallon size ziplock bag. There is such a feeling of satisfaction being able to harvest product from your own garden. I grow everything organically; no pesticides.
Swiss Chard
OK, and then on to my mini harvest of tomatoes...

Red Cherry and Yellow Pear Tomatoes
Don't these look delicious! I remember the first time I picked a cherry tomato. It was in our neighbor's garden in Escondido, California. I was 4 or 5 years old, and our neighbor let us come over and pick some to snack on. I will never forget how good those cherry tomatoes tasted. My lifelong love of gardening started right then! Anyway, there is nothing better than popping a cherry tomato fresh off of the plant into your mouth. Heaven! I did just that while picking these and I can say that these are fantastic.
I also have some sprouts growing. I usually have 3-4 different sprouts going on the counter every week. This week I sprouted lentils, peas, garbanzos and broccoli. Here is a picture of the broccoli sprouts....

We've been eating sprouts at every meal this week. Great taste, nutritious and a perfect addition to whatever we're eating. This particular broccoli seed has been some of the best I've ever sprouted. You can order some at  www.sproutshop.net .  Click here for the broccoli seed page.

Monday, May 7, 2012


MICROGREENS

Note: This is a guest post by www.sproutshop.net on how to grow microgreens.


  Picture courtesy of Sunset Magazine

Microgreens are a relatively recent addition to the produce aisle. These tiny seedlings are harvested when the first true leaves appear (after the cotyledon or seed leaf stage). They are a specialty crop which many chefs like to use to garnish their dishes or add to salads. Microgreens add color, flavor and texture to any dish. In addition, they are a nutrient dense food, meaning that they provide a significant amount of nutrients compared to the calories in the food. According to the University of Florida IFAS Extension, Sprouts, microgreens and baby greens are simply greens harvested and consumed in an immature state.

·         Sprouts the youngest/smallest, are germinated seed which is sprouted, and are consumed whole. Are ready to eat in 2-6 days after soaking.

·         Microgreens slightly older/larger (about 2-3” tall). Are ready to eat within a week of planting. Some varieties take longer. They are cut at the soil level at harvest.

·         Baby Greens or Petite Greens the oldest/largest (3-4” tall). Are usually ready to eat in 1-2 weeks. They are cut at the soil level at harvest.


Baby lettuce greens grown by  www.sproutshop.net 

Growing microgreens or baby greens can be grown in a garden, or on a kitchen counter or covered patio table (weather permitting). This is a great way to have a year round garden!


Here’s what you’ll need to grow microgreens:

·         Seedling Trays, recycled plastic trays or short pots

Seedling trays are best, but there is nothing wrong with using plastic trays that used to contain some sort of produce you bought. These don’t need to have holes in the bottom, as long as you don’t over water.

·         Organic potting mix, vermiculite and worm castings

Using organic potting mix is best. It doesn’t hurt to add some vermiculite to the mix, as it makes for better soil drainage. Some growers swear by adding worm castings to the mix. You can purchase these from garden centers.

·         Spray Water Bottle or water bottle with small pull up spout

Spray your seeds to keep moist until they sprout, and keep emerging plants from drying out while growing.


How to start your microgreens:

1.    Fill seed tray with good quality, nutrient rich potting soil. Lightly compact soil (using a tamping device or the back of a spoon) to create an even surface. Do not  compact the soil or you will not get good growing results

2.    TIP: Be sure not to overfill the soil or you will have a mess on your hands when you water. Leave ½” space from the soil line to the top of your container.

Microgreens kit with radish seed – www.sproutshop.net
  

3.    Add seeds. Sprinkle high quality seeds over your soil, evenly. You can plant densely, or sparsely, depending on your preference.

4.    Press the seeds lightly into the soil without pressing them under the soil. Use a tamping tool or the back of a spoon. This will help the seeds to set roots.

5.    Cover the seeds with soil or paper towel. Soil is best for large seeds. Sprinkle soil over the seeds to keep them covered and moist after watering. For small seeds, use the paper towel by gently placing towel over the entire surface.

6.    Water. Use plenty of water but apply it in a gentle way to not disrupt the seeds. The seeds should not be in standing water, but should be moist.

7.    Cover Tray using the clear plastic dome that comes with your tray. It will keep your seeds warm and moist; kind of like a mini greenhouse!

8.    Germinate seeds by keeping soil/paper towel covering seeds moist. Seeds will push up the towel or soil. You can remove the paper towel once the seeds begin to push up the towel.  Consider using a spray bottle to mist the seeds/soil at this point, or a water bottle with a pop-up drinking cap to gently squeeze water onto germinated seeds. TIP: small seeds may have fuzz, which can look like mold, but is normal for many seed varieties.

Sunflower seeds beginning to grow in seedling tray
9.    Put in a location with indirect sunlight or under a grow light once growth is established. You can remove the cover at this point as well. Do not put your microgreens in the sun with the cover on or they will overheat die.

10. Harvest and Eat!

You can decide at what point you want to cut your microgreens and eat them. Cut a few once they are a couple of inches high and see how you like the taste. Sunflower greens should be cut before they reach the true leaf stage (before another set of leaves appears in the center of the first leaves) or they might taste bitter. Use clean, sharp kitchen scissors to harvest your microgreens. After harvesting, your greens will keep for 7-10 days in the refrigerator in an airtight container.


Sunflower microgreens, cut and washed

Monday, February 6, 2012

Recipe: Sauteed Vegetables with Lentil Sprouts


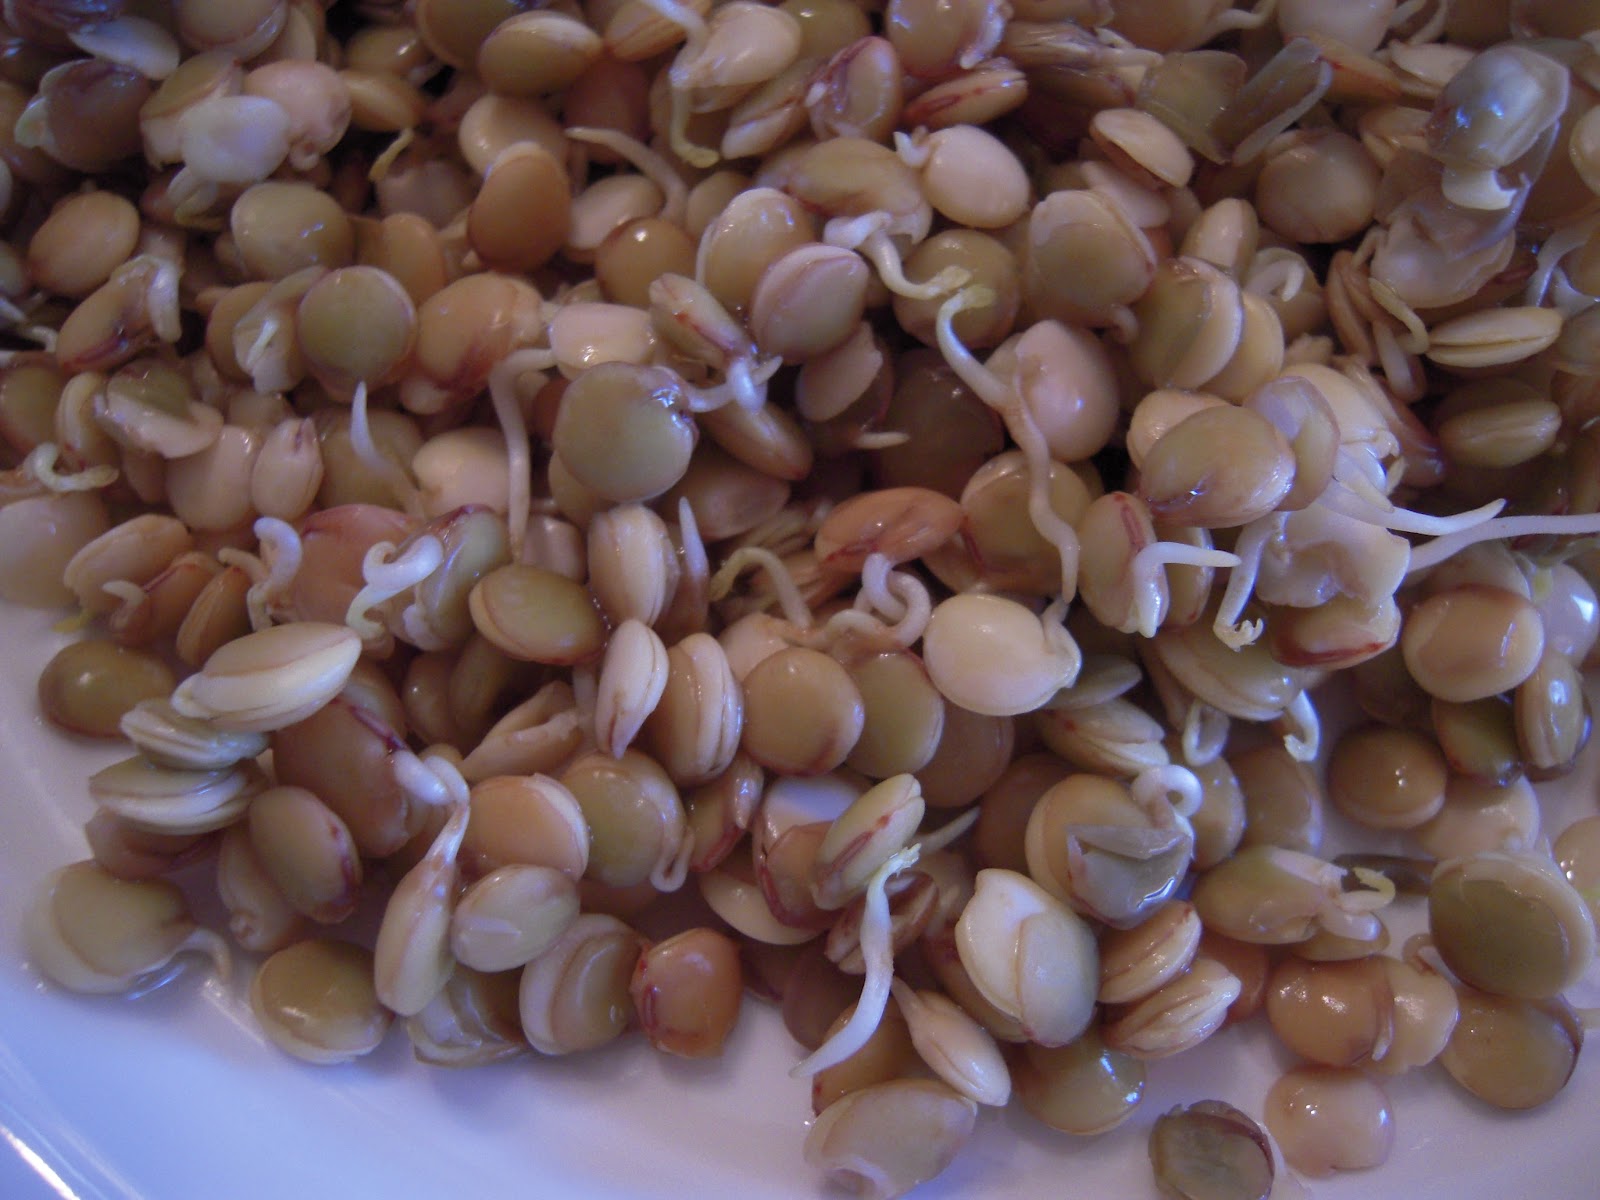
Here are the lentils I sprouted to use in my stirfry. You can see how to sprout lentils, here and buy lentils for sprouting here. Sprouted Lentils are a wonderful addition to stirfry, chili, or garden burgers. Put the lentil sprouts into the large frying pan/wok, along with ginger, garlic and 1/2 c. broth. I like to steam the lentils first so that they are nice and tender.


After the lentils have steam cooked for about 3-5 minutes, add the rest of your chopped/diced vegetables. Next I added some fresh, peeled and chopped water chestnuts. They were in the Asian pack from my co-op, Bountiful Baskets. Awesome!


Then, add the rest of your chopped/diced vegetables. I like to get a huge gallon sized bag of vegetables prepared in advance of the meal. Then, it is easy to add to the pan. Below, I have included Swiss Chard, snap peas, celery, pre-cooked green beans. This is about 6-8 cups of chopped/diced vegetables.

Here it is in the frying pan. I cook just until everything is tender, but not overdone. Stir and turn constantly. Add additional small amounts of broth during the cooking process so that it doesn't burn


Sorry I didn't get a picture of the completed dish. It was served with fish and brown rice.

How to Sprout Lentils


I decided to go ahead and sprout some lentils. I have several sprouters, but I'm especially fond of the Easysprout sprouter. It is truly the best manual sprouter on the market. Anyway, the nice thing about the Easysprout sprouter, is that it takes up so little space, and it is very easy to use.

Recipe for growing lentil sprouts. Decide how much to sprout. A good place to begin is 1/4-1/2 cup.
  1. Examine lentils for dirt or small rocks. Pick out anything that isn't a lentil and discard
  2. Rinse thoroughly. You can do this right in the Easysprout sprouter. Place lentils in the inner cup. Run water over the top and let it run through the inner cup.
  3. Place inner cup inside of outer cup, and fill with water. Have water come several inches above the lentils. Leave to soak for 12 hours. Overnight works great.
  4. Pull inner cup out and drain. Discard soak water. Great for watering your plants!
  5. Rinse every twelve hours. Continue to do this until the lentils are sprouted to your satisfaction.
Here are some pictures:

sprouted lentils 24 hours past soak

sprouted lentils 48 hours past soak

I like using the lentils at this point. I don't want them to form leaves. These are perfect for garden burgers, chili or stirfry. See my post on using sprouted lentils in stirfry here.

Monday, January 23, 2012

Recipe: Hummus, Tomato, Spinach and Sprouts Sandwich


Today for lunch I looked in the refrigerator to see what I could create. It was slim pickings let me tell you! Husband and I were in California all week, and we just stopped by the little market in town on the way home for a few things. However, I still had some sunflower greens left (they keep for a week or two after picking if you put them dry into an airtight container in the refrigerator). I had just picked up the tomatoes and the Sara Lee Thin Style Buns (honey wheat) at the market. So, I spread some hummus onto the bun...


I used the Athenos Roasted Garlic Hummus that I had on hand.


Here is a picture of the sunflower greens that I grew a couple of weeks ago.


From there, it was just assembling all of the ingredients.


It was really very delicious. I put some spinach on (see it peeking out under the sliced tomatoes?).

For under 200 calories, this is a very delicious sandwich, full of flavor and nutrition.  Here's the recipe (copy and paste it to a word document, and then print it out):

Hummus, Tomato, Spinach and Sprouts Sandwich

Sara Lee Thin Style Buns  100 calories

2 TBSP Hummus, 50 calories

Sunflower sprouts, Spinach, Sliced tomatoes, 25 calories if that

Open bun. Spread 1 TBSP of hummus on each side of bun. Place spinach, sprouts and sliced tomato on either side of bun. Carefully put tomato side on top of sprout side to form the sandwich. Enjoy!


Try it and let me know how much you enjoyed it!

Thursday, January 5, 2012

Garden Report Jan. 5, 2012

If you are trying to get more vegetables into your diet, the best way is to grow your own. Not only will they be fresh with better nutrient values, but they just taste better. Fresh vegetables are better in any recipe. You can grow most vegetables in pots if you don't have space for a large garden. Gardening is also a great hobby!


 Garden gnome from my friend, Char watches over my vegetables!

I've always enjoyed gardening. I remember as a 5 year old, visiting our neighbor in Escondido, California who had a wonderful garden. He allowed my siblings and I to pick cherry tomatoes off of his plants, and we'd pop them in our mouths. Delicious! Perhaps that is when I caught the gardening bug!?
I have a year round container garden. Here is how the plants are looking as of today:


These are beets. I have two pots of beets and they are doing very well. I might clip some of the greens for our stir fry tonight. I am so tempted to pull up a plant and see if I have any actual beets.


Swiss chard. I love this stuff. Great for smoothies and in stir fry. I will definitely be clipping some of this for tonight's dinner.


Peas. I have 2 pots of peas. Since the garden is covered in plastic, I think that these took a bit of a hit. Too hot under there. I took the plastic off for the day. Temps are in the 60's daytime and low 30's nighttime. Fortunately, they are making a come back.


Here are the sunflower greens I'm growing in the kitchen. I love sunflower greens. Awesome taste and so nutritious! They are delicious on salads, sandwiches and scrambled eggs.


This is a picture of the black oil sunflower seeds I get from Sprout People

Wednesday, December 28, 2011

Growing Microgreens


Microgreens are a quick way to grow delicious produce from your garden or kitchen.  They are grown from radish, cabbage, beet, and other greens. They usually take about 10 days to grow, and are cut off when they reach 2-3 inches just above the soil line.


(picture courtesy of Sunset.com)
I wanted to share an excellent video with you on growing microgreens. I found it on YouTube, and it is  by a company who grows microgreens for sales to restaurants and farmer's markets in their area. I think that the principles of growing can be used for home production as well.

The one type of microgreens that I love to grow are sunflower greens. They are so tasty.


I buy my microgreens seed from sproutshop. I've used sunflower greens for many years. Here is a recipe that I posted back in 2008 for sprout burgers using sunflower greens.

Sunday, November 30, 2008

Sprout Burgers

This is a yummy recipe, which you will want to make all of the time! So, you'll need to have sprouts on hand from the health food store, or start sprouting your own.

First, you need to begin with 3 cups of sprouts. Use sturdy sprouts such as lentils, adzuki, mung, sunflower, garbanzo, etc. If you have alfalfa or broccoli sprouts, save those for garnishing the sandwich.

Assemble your ingredients:

3 c. sprouts
2 eggs
1/2 c. flour (I used whole wheat)
1/4 c. milk
2-3 green onions, chopped
2 cloves garlic, minced
1 tsp dried thyme
salt and pepper to taste

Mix the flour, eggs, and milk in a bowl. I just now noticed that I forgot one egg and my "batter" was a little thick...it still turned out just fine.

After measuring the sprouts, chop them using a chopping knife or put them into a food processor. You don't want a puree, but rather a fine chopped product.

Mix the sprouts into the batter until the ingredients are well blended.
Drop large spoonfuls onto a heated griddle. I put a little olive oil on first, then heat it up. Cook on each side until browned.

I like to serve these on buns with mayonnaise, tomato slices and broccoli sprouts. Today I toasted up some honey bran whole wheat bread that I baked yesterday. I got the recipe at Foodie Farm Girl; It made for a great Sunday evening meal.


Sprout Burgers
adapted from sprout people

3 c. sprouts
2 eggs
1/2 c. flour (I used whole wheat)
1/4 c. milk
2-3 green onions, chopped
2 cloves garlic, minced
1 tsp dried thyme
salt and pepper to taste

Mix flour, eggs and milk in a medium-large bowl until ingredients incorporated. Chop sprouts (or use food processor and pulse until medium chop consistency), green onions and mince garlic cloves. Mix all ingredients together. Spoon "batter" onto hot, oiled griddle or frying pan. Fry on each side until golden brown. Serve on bun, garnish with tomato and broccoli or alfalfa sprouts.

Thursday, November 27, 2008

Sprouts: second progress report

Happy Thanksgiving! Today, before getting into today's food preparation, I wanted to show how the sprouts are doing. I am going to put them in refrigerator where they will last for about a week (that's if I didn't have plans for them..hahaha!). I am going to let the broccoli sprouts sit in the window uncovered for a few hours to green them up a bit. Below are the broccoli sprouts.

Here is a picture of the lentil sprouts. I could have put these in the refrigerator yesterday before they got leaves. But, they are just fine for the sprout burgers I'll be making tomorrow.

The adzuki bean sprouts are still covered and on the counter. Stay tuned for my yummy sprout burger recipe that I'll post tomorrow.

Tuesday, November 25, 2008

Sprouts: a progress report

A lot of people have been asking me about sprouting, so I thought I'd share what I know about sprouts. I've been doing sprouts now for many years. They are really great in a salad or on a sandwich. They are so nutritious and very tasty! I have a recipe for a wonderful sprout burger that I'll share with you by the end of the week. But, for now, I just wanted to show you how my sprouts are doing. I soak a couple of tablespoons worth of sprouting seed in a custard cup over night, then pour the seeds into a sprouting tray. I lightly rinse the sprouts a couple of times a day. They need the moisture to continue sprouting.

This first picture is of adzuki bean sprouts. If you click on the picture, so can see the beans just beginning to sprout.

These are lentil sprouts, and they are really starting to take off! The tray that you see just barely on the left is full of broccoli sprouts.

So, make sure you check back often for the continuing daytime drama of how the beans sprouted! They will be on the chopping block soon ......to be continued!

Saturday, November 1, 2008

Farmer's Market Report

Today was the last day of farmer's market this year in St. George. I am really going to miss it. Sigh! Most of the produce vendors are gone, and there were a lot of craft sellers there today. I immediately went hunting for Lea's Micro Market, because I get my sunflower sprouts from her. If I remember correctly, her farm is in Veyo. Anyway, she has terrific greens and sprouts.

Today she had bags of bok choy, greens, sprouts and she had bunches of turnips.

She gave me a taste of the white turnips, and all I could say is "I'll take some!". They are really delicious. I'll use the turnip greens in a recipe also. I also bought a bag of greens and a container of sunflower sprouts (LOVE THESE...yummers!)

From another vendor, I bought some cilantro in a pot. I am tired of paying such a high price for cilantro. I am going to put the pot in my kitchen window, and for $4, I will get a lot more cilantro for the money.
I will use the turnips tomorrow for Sunday dinner, and maybe the greens. Check back on Monday, when I will post about how I prepared them!

Friday, October 10, 2008

Chicken Salad Sandwich * Food Storage Friday

My friends all know that I am dedicated when it comes to food storage. So, I've decided to devote Friday to food storage posts. You might find them on another day of the week, but Fridays will always have a food storage post. To get us started, here is one of my favorites, chicken salad.

Ingredients:

12.5 oz can chicken
1 c. cashews
1 c. grapes, cut in half
1/2 tsp. Hidden Valley Ranch dressing (in foil package)
1/2 - 1 c. mayo or miracle whip
broccoli sprouts


Drain the water from the can of chicken, put in a bowl and mush up a bit with a fork. Add the mayo, grapes, dressing powder and cashews and gently stir around until mixed in. If you are making this for later, add the cashews before serving. (note: I got the HV ranch hint from my friend, Susan S.)

This is really delicious on whole wheat bread with broccoli sprouts as shown below. It is equally as yummy on a croissant or on a bed of lettuce.
Yep, I ate this very sandwich for lunch and yes, it was good. I had it with a glass of limeade with a bit of blueberry Naked Juice stirred in.


If you try this recipe, and decide that it is a keeper, put the ingredients into your food storage. For example, if you will make this recipe once a month, you will need 3 times the recipe for your 3 month storage:

3 cans of chicken, 1 1/2 to 3 c. mayo or miracle whip, 3 cups of cashews, broccoli seeds for sprouting, 1 package of Hidden Valley Ranch dressing in the foil package. You can't store fresh grapes, but in a pinch, this could be served without the grapes, maybe substitute apple or celery.
If you are into sprouting your own sprouts, make sure that you get seeds for this purpose. Visit www.sproutshop.net  for great sprouting seed, microgreens kits and sprouters.